Homemade Granola Butter: Your Delicious Nut Butter Alternative
In a world brimming with spreads, from classic peanut butter to artisanal almond blends, a new contender has emerged, captivating taste buds with its unique flavor and versatility: granola butter. Imagine the comforting, toasty essence of your favorite granola, transformed into a lusciously smooth, spreadable delight. This isn't just a trend; it's a delicious and often healthier alternative, especially for those seeking nut-free options or simply a novel taste experience. If you've ever wondered how to make granola butter that rivals store-bought varieties, you're in the right place. Get ready to embark on a culinary journey that promises a spreadable treat reminiscent of an oatmeal cookie, a bowl of warm porridge, or your favorite crunchy granola, all in one.
What is Granola Butter, and Why Make Your Own?
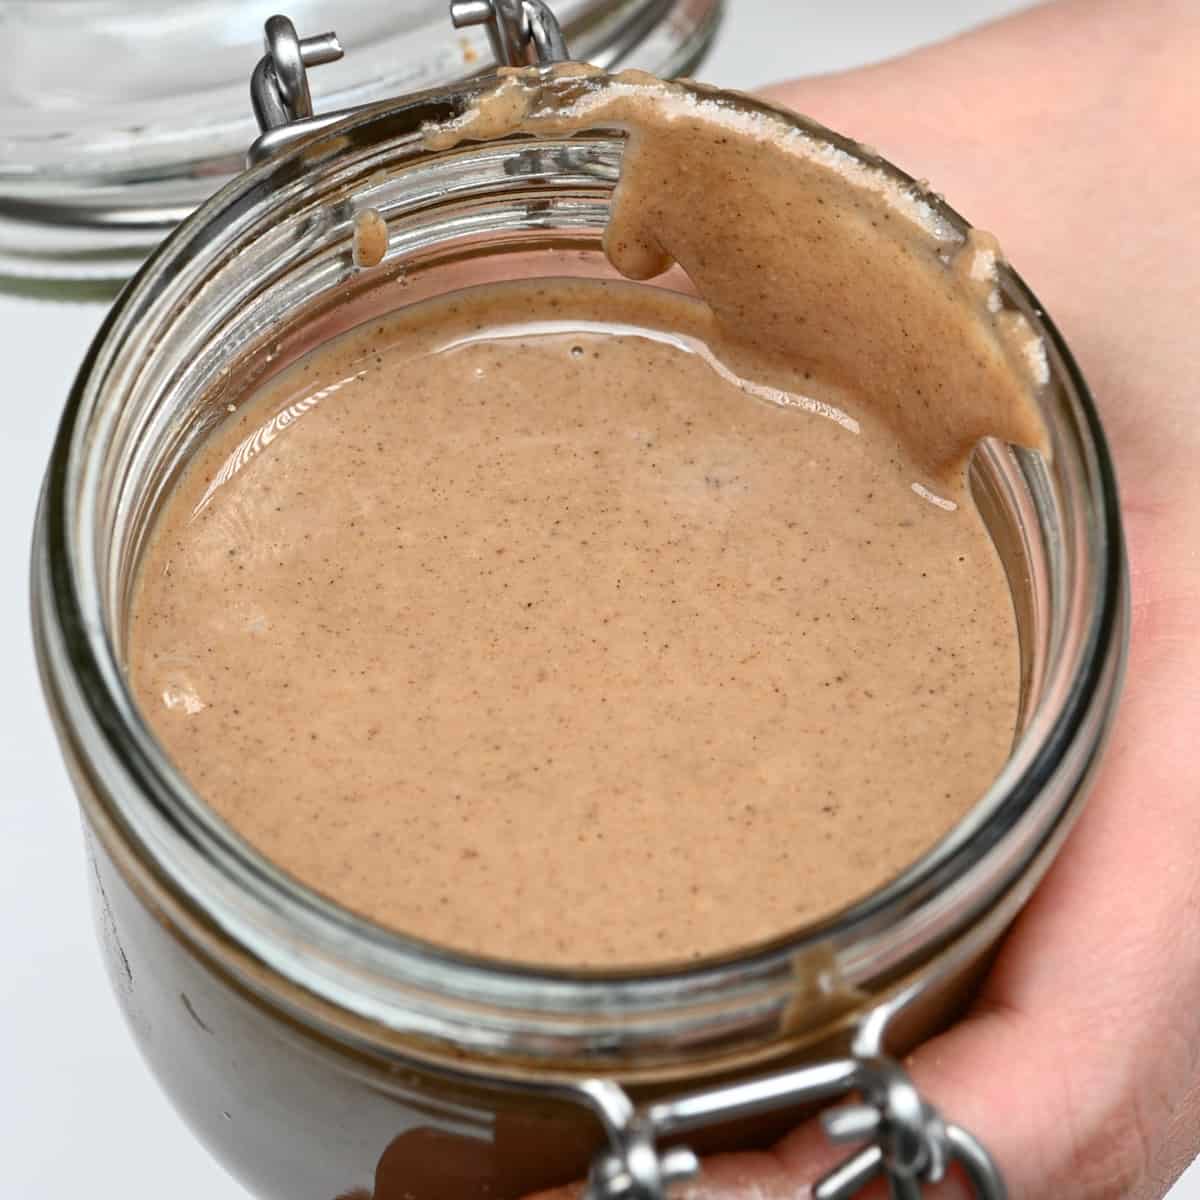
Granola butter, often affectionately called "oatmeal butter" or "oat butter," is precisely what its name suggests: a blend of granola-inspired ingredients, pulverized into a creamy, spreadable butter. It's typically a harmonious marriage of oats, nuts or seeds, a natural sweetener, and a symphony of spices. The result is a vibrant, nutrient-dense spread that offers a delightful departure from traditional nut butters.
So, why go through the effort of making your own when shelves are packed with options? The reasons are plentiful and compelling:
- Unmatched Customization: Homemade granola butter is a "sky's the limit" recipe. You control every ingredient, from the type of oats and nuts to the sweetener and spice blend. This allows you to tailor it perfectly to your dietary needs, flavor preferences, and even specific allergies (e.g., making it entirely nut-free with seeds).
- Healthier Choices: Many commercial spreads contain unwanted additives, excessive sugars, or unhealthy oils. By making it yourself, you ensure a clean, wholesome product. This particular recipe often boasts benefits like being gluten-free, dairy-free, refined sugar-free, and even oil-free (though a little oil can aid texture). It’s packed with fiber from oats and healthy fats from nuts, contributing to sustained energy and satiety.
- Cost-Effectiveness: While initial investment in a good blender is helpful, raw ingredients are often more economical than specialty nut or seed butters, especially if you buy in bulk.
- Unique Flavor Profile: Granola butter offers a distinct flavor that often evokes the comforting notes of an oatmeal cookie or a warm bowl of spiced oats. It's a wonderful alternative for those with nut allergies or anyone looking to diversify their pantry spreads.
It's this blend of delightful taste, health benefits, and personal control that makes learning how to make granola butter such a rewarding endeavor. For a deeper dive into the health aspects and gluten-free preparation, be sure to explore our guide on How to Make Granola Butter: Healthy, Smooth, & Gluten-Free.
The Essential Ingredients for Homemade Granola Butter
Crafting the perfect granola butter starts with selecting high-quality ingredients. While the core components remain consistent, subtle variations can dramatically alter the final flavor and texture. Here’s a breakdown of what you’ll need:
The Base: Oats and Nuts (or Seeds)
- Rolled Oats: This is the non-negotiable star. Rolled oats (also known as old-fashioned oats) are crucial for achieving the right texture and flavor. They break down beautifully into a creamy consistency. Avoid instant oats, which can become gummy, and steel-cut oats, which are too hard and won't blend smoothly without extensive processing.
- Walnuts (or Pecans): Walnuts are highly recommended for their rich flavor and ability to blend into an incredibly smooth butter. Their healthy fats are readily released, aiding in the blending process. Opt for shelled walnuts to save significant preparation time. Pecans are a fantastic alternative, offering a slightly different, buttery flavor profile. For a truly nut-free version, sunflower seeds or pumpkin seeds can be used, though they might yield a slightly different color and flavor.
Sweetener, Spices, and Enhancers
- Liquid Sweetener: Maple syrup or agave syrup are excellent choices, providing natural sweetness and contributing to the smooth texture. For a sugar-free alternative, a liquid sweetener like monk fruit syrup works wonderfully. Important: Do not use granulated sugar, as it will likely leave your granola butter grainy unless it's powdered sugar, which isn't typically used in this context. The liquid form is key to smooth blending.
- Aromatic Spices: This is where the "granola" and "oatmeal cookie" magic happens! A combination of ground cinnamon, nutmeg, and cardamom, along with vanilla powder (not extract!), creates a warm, inviting, and complex flavor. A pinch of salt is essential to enhance and balance all these delightful aromas.
- Optional Oils (for texture): While many recipes aim to be oil-free, a touch of neutral oil can be a game-changer for achieving a super smooth, pourable consistency, especially if your nuts aren't releasing enough oil. Coconut oil (refined to avoid coconut taste), avocado oil, or light olive oil are good choices. Start with a small amount (e.g., 1-2 tablespoons) and add more if needed.
Exciting Add-ins (Optional)
- Toasted Shredded Coconut: Up to ¼ cup of finely shredded coconut (toasted briefly) can significantly amplify that classic granola flavor.
- Cocoa Powder: For a decadent chocolate version, add a tablespoon or two of unsweetened cocoa powder. You might need a little extra oil or liquid sweetener to compensate for the added dry ingredient.
- Nutrient Boosters: A few tablespoons of chia seeds or ground flaxseed can easily be incorporated for an extra dose of omega-3s and fiber.
Mastering the Process: How to Make Granola Butter Smooth and Delicious
Creating your own granola butter is surprisingly straightforward, but it does require a little patience and a high-speed blender. The secret to its velvety texture and deep flavor lies in two crucial steps: toasting and thorough blending.
- The Power of Toasting: This is arguably the most important step for flavor development. Toasting your oats and nuts (or seeds) before blending does two vital things:
- Enhances Flavor: It deepens their natural nuttiness and brings out those delightful, warm, roasted notes that are characteristic of good granola.
- Aids Blending: For nuts, toasting helps them start releasing their natural oils, which significantly speeds up the blending process and contributes to a smoother, creamier butter. You can toast them in the oven on a baking sheet at a moderate temperature (around 325-350°F / 160-175°C) for 5-10 minutes, or in a dry skillet over medium heat, stirring frequently, until fragrant and lightly golden. Be careful not to burn them!
- Blending for Bliss: Once your toasted ingredients have cooled slightly, it's time for your high-speed blender or food processor to shine.
- Combine Ingredients: Add your toasted oats, nuts, sweetener, spices, and salt to the blender. If using optional oils, add them now.
- Blend in Stages: Start blending on a low setting, gradually increasing the speed. Initially, the mixture will look like coarse flour, then breadcrumbs, and eventually a clumpy paste. This is normal.
- Patience is Key: The magic happens as the ingredients continue to break down. You'll need to stop the blender frequently to scrape down the sides, ensuring everything gets evenly processed. The mixture will warm up, and the nuts will release more oils, transforming the paste into a smooth, creamy butter. This can take anywhere from 5 to 15 minutes, depending on your blender's power. Keep blending until it reaches your desired consistency – thick, pourable, or somewhere in between.
- Troubleshooting Texture: If your butter is too thick or seems stuck, add a teaspoon of neutral oil (coconut, avocado, or olive) or a tiny splash of liquid sweetener, and continue blending. If it's too thin, it might be over-processed, or you added too much liquid; consider adding a few more toasted oats and blending again briefly. For more detailed tips on achieving that perfect texture and ingredient insights, take a look at our guide on Secrets to Smooth Granola Butter: Toasting & Ingredient Tips.
Creative Ways to Enjoy Your Homemade Granola Butter
Once you've mastered how to make granola butter, the possibilities for enjoying this delicious spread are endless. Its unique flavor profile makes it a versatile ingredient for both sweet and savory applications.
- Classic Spreading: The most obvious and delightful way to enjoy granola butter is spread generously on toast, bagels, rice cakes, or English muffins.
- Fruit & Veggie Dipper: Pair it with sliced apples, bananas, pears, or even celery sticks for a healthy and satisfying snack.
- Breakfast Booster: Swirl a dollop into your morning oatmeal, yogurt, or chia pudding for an extra layer of flavor and nutrients. It also makes an incredible topping for pancakes, waffles, or French toast.
- Smoothie Enhancer: Add a tablespoon or two to your favorite smoothie recipe for creaminess, flavor, and a nutritional boost.
- Baking & Dessert: Use it as a filling for cookies, a swirl in brownies, a base for energy balls, or even as a unique frosting for cupcakes. It can also be drizzled over ice cream or used to make granola butter cups.
- Savory Surprise: While primarily sweet, a tiny dollop can add an interesting depth to certain savory dishes, like a creative glaze for roasted vegetables or a unique element in a salad dressing.
Storage: Store your homemade granola butter in an airtight container in the refrigerator for up to 2-3 weeks. Like natural nut butters, separation may occur, so simply give it a good stir before each use.
Learning how to make granola butter opens up a world of delicious, healthy, and customizable possibilities. From its delightful oatmeal-cookie-like flavor to its impressive nutritional profile, this homemade spread offers a fantastic alternative to traditional nut butters. With a simple blend of toasted oats, nuts, and warm spices, you can create a versatile, wholesome, and incredibly satisfying spread that’s perfect for dipping, spreading, and everything in between. So, gather your ingredients, fire up your blender, and prepare to elevate your snacking and meal prep with this truly unique culinary creation.
