Move over, traditional nut butters! There's a new spread in town that's capturing hearts and taste buds with its unique blend of creamy texture and wholesome goodness. We're talking about granola butter – a delectable, spreadable concoction that combines the best elements of nuts, oats, and your favorite granola into one irresistible butter. If you're looking for a healthy, smooth, and naturally gluten-free alternative to peanut butter or almond butter, learning how to make granola butter at home is a game-changer. This comprehensive guide will walk you through everything you need to know to create your own batch of this delicious, nutrient-packed spread.
What Exactly is Granola Butter (and Why You Need It)?
Granola butter, also affectionately known as oatmeal butter or oat butter, is precisely what it sounds like: a creamy spread made from granola-like ingredients. Imagine the comforting flavors of an oatmeal cookie, a warm bowl of oatmeal, or your favorite crunchy granola, all transformed into a luxurious, dippable, and spreadable butter. It's a culinary marvel that brings together the richness of nuts, the heartiness of oats, and a medley of warm spices.
Beyond its incredible taste, granola butter offers a host of benefits that make it a compelling choice for health-conscious individuals:
- Nutrient-Packed: With ingredients like oats (a fantastic source of fiber) and walnuts (rich in omega-3 fatty acids and antioxidants), this butter is far more than just a tasty treat.
- Dietary-Friendly: When prepared correctly, granola butter is naturally gluten-free, dairy-free, oil-free (or uses healthy oils), and can easily be made refined sugar-free. This makes it an excellent option for those with specific dietary needs or preferences.
- Versatile Alternative: For anyone with nut allergies or those simply seeking to diversify their diet, granola butter provides a delicious and nutritious substitute for traditional nut butters. It has that satisfying richness without relying solely on nuts.
- Sustained Energy: The fiber content from the oats helps keep you feeling fuller for longer, making it a great addition to breakfast or a satisfying snack.
The beauty of homemade granola butter lies in its simplicity and the ability to customize it to your exact preferences. It truly is a spreadable taste of comfort!
Gathering Your Ingredients: The Heart of Delicious Granola Butter
The foundation of an amazing granola butter starts with selecting the right ingredients. While the concept is flexible, certain choices will elevate your spread from good to absolutely glorious. Here’s a breakdown of the core components and key considerations:
Choosing the Right Oats and Nuts
- Oats: The star of the show! For the best texture and flavor, always opt for rolled oats (sometimes called old-fashioned oats). They blend down beautifully and contribute to that coveted creamy consistency. Avoid instant oats, which can yield a gluey texture, and steel-cut oats, which are too coarse and won't break down adequately into a smooth butter.
- Nuts: Walnuts are the preferred choice in many popular recipes, and for good reason. They blend down into an incredibly smooth, creamy butter thanks to their natural oil content and softer texture. They also impart a wonderful, earthy flavor that complements the oats and spices perfectly. If walnuts aren't available or preferred, pecans are a suitable alternative. Make sure to buy shelled nuts to save time and effort.
Sweeteners and Spices: Crafting the Signature Flavor
These ingredients are what transform a simple oat and nut blend into something reminiscent of an oatmeal cookie or your favorite granola. This is where you really start to learn the nuances of how to make granola butter shine!
- Sweetener: Liquid sweeteners are crucial for achieving a smooth consistency. Maple syrup and agave syrup are excellent natural choices, offering a lovely caramel note. For a sugar-free alternative, a liquid sweetener like monk fruit sweetener works beautifully. Avoid granulated sugars, as they often won't break down properly and can leave your granola butter grainy. If you only have granulated sugar, try to use powdered sugar, which is finer and dissolves more readily.
- Spices: This is where the magic happens! A harmonious blend of ground cinnamon, nutmeg, and cardamom, along with vanilla powder, creates that signature warm, "oatmeal cookie" or "granola" flavor profile. A pinch of salt is also essential to enhance and balance all the other flavors. While vanilla extract is common in baking, vanilla powder provides a more concentrated flavor without adding extra liquid, which can affect the final consistency.
Elevating Texture and Nutrition with Optional Add-ins
Once you've mastered the basic recipe, you can experiment with these optional ingredients to customize your granola butter:
- Oil for Smoothness: While the basic recipe can be oil-free, a small amount of neutral-flavored oil can significantly enhance the smoothness and pourable consistency, especially if you're aiming for a thinner butter. Coconut oil (refined coconut oil won't impart a coconut flavor), avocado oil, or light olive oil are all excellent choices.
- Toasted Shredded Coconut: For an even richer, more "granola-like" flavor, add up to ¼ cup of toasted shredded coconut. Toast it lightly in the oven or a skillet until golden brown before blending.
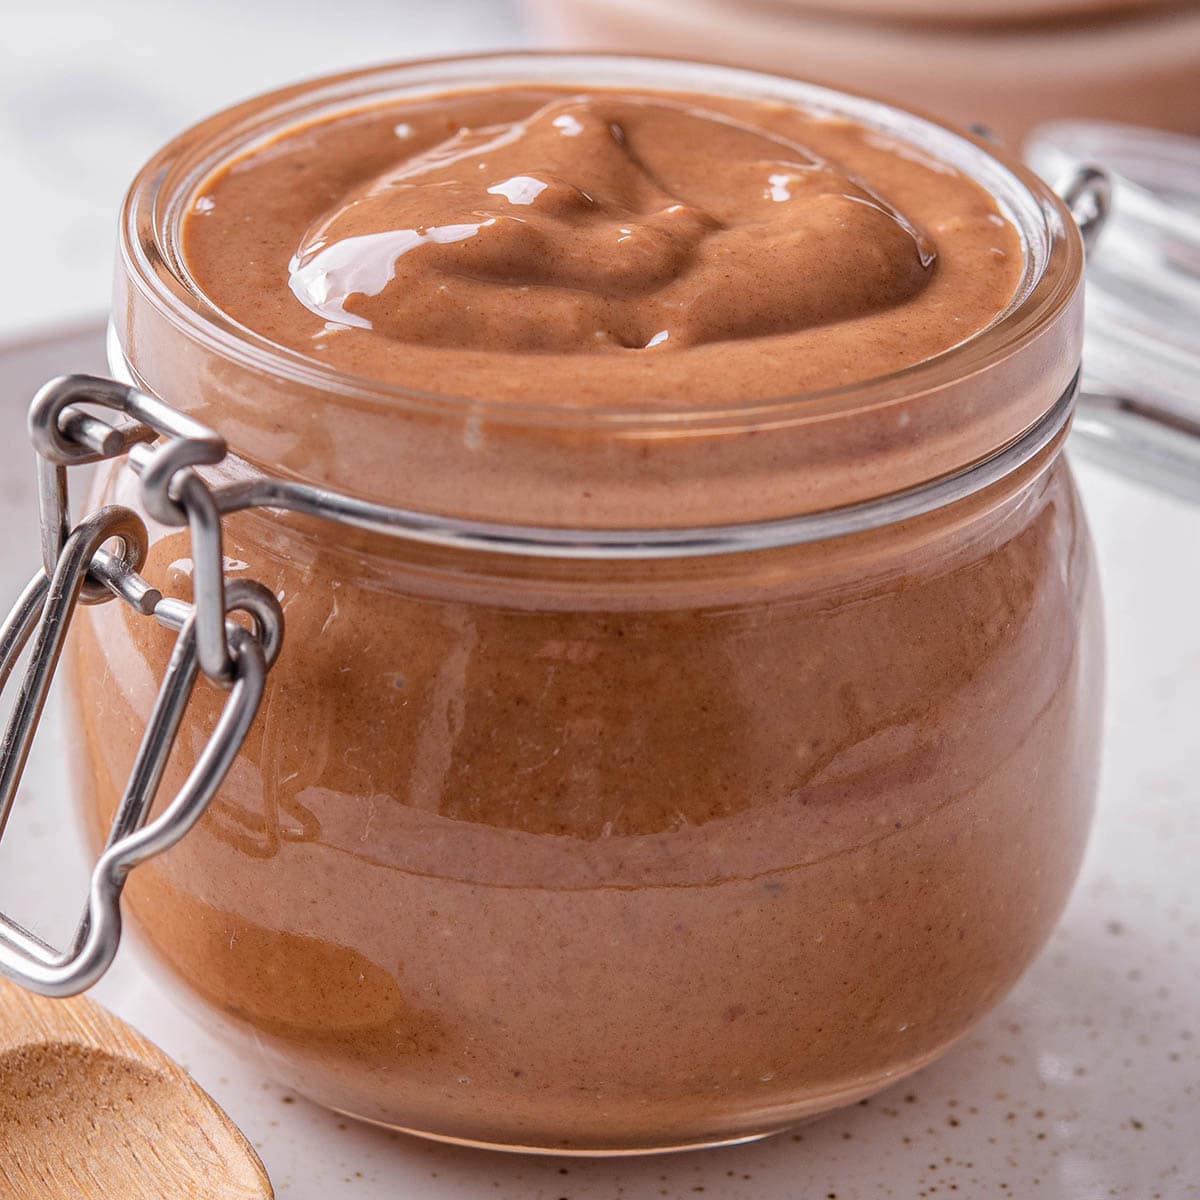
- Cocoa Powder: Transform your granola butter into a delightful chocolate version by adding a tablespoon or two of unsweetened cocoa powder. You might need a tiny bit more oil to compensate for the added dry ingredient.
- Nutrient Boosters: For an extra dose of omega-3s and fiber, blend in a few tablespoons of chia seeds or ground flaxseed. These will also help thicken the butter slightly.
Step-by-Step Guide: How to Make Granola Butter Perfectly Smooth
Mastering the art of how to make granola butter is incredibly rewarding, but it does require a bit of patience, especially during the blending process. Your high-speed blender will be your best friend!
The Crucial Role of Toasting
This is a step you absolutely shouldn't skip. Toasting your oats and nuts is paramount for two main reasons:
- Flavor Enhancement: Heat brings out the nutty, rich flavors of both the oats and walnuts, deepening their aroma and taste, much like when you make homemade granola.
- Oil Release: For nuts, toasting helps them start releasing their natural oils, which is vital for achieving a super smooth and creamy butter more quickly in the blender.
How to Toast: Spread your rolled oats and walnuts (and shredded coconut, if using) in a single layer on separate baking sheets. Bake in a preheated oven (around 300-325°F / 150-160°C) for 10-15 minutes, stirring occasionally, until lightly golden and fragrant. Keep a close eye on them to prevent burning. Coconut will toast much faster (around 5 minutes), so toast it separately.
Blending Techniques for Silky Smoothness
Once your ingredients are toasted and slightly cooled, it's time for the main event:
- Combine Dry Ingredients: Add the toasted oats and walnuts (and toasted coconut, if using), along with your spices (cinnamon, nutmeg, cardamom, vanilla powder, and salt) to your high-speed blender or food processor.
- Begin Blending: Start blending on a low setting, gradually increasing to high. The mixture will go through several stages:
- Crumbly: Initially, it will look like a coarse flour or crumbs.
- Coarse Meal: As it continues, it will resemble a finer, wetter meal.
- Thick Paste/Ball: Eventually, the nuts will start releasing their oils, and the mixture may clump into a thick paste or even form a ball. This is normal!
- Creamy Butter: With continued blending, and plenty of scraping down the sides, it will transform into a thick, smooth, and creamy butter.
- Add Wet Ingredients: Once you have a thick paste, add your liquid sweetener (maple syrup, agave, or monk fruit sweetener). Continue blending. If adding cocoa powder or chia/flax seeds, now is a good time.
- Achieve Desired Consistency: Keep blending, scraping down the sides of the blender frequently with a spatula. This might take 10-15 minutes or even longer, depending on your blender's power. If the butter is too thick or you desire a more pourable consistency, gradually add a tablespoon of your chosen oil (coconut, avocado, or olive oil) at a time, blending until fully incorporated and smooth.
Tip: If your blender starts to get warm, pause for a few minutes to let it cool down before continuing. This protects your appliance and prevents the butter from getting too hot.
Troubleshooting Common Granola Butter Challenges
- Grainy Texture: This is often due to using granulated sugar, not blending long enough, or using the wrong type of oats (like steel-cut). Ensure you're using rolled oats and a liquid sweetener, and *be patient* with the blending process.
- Too Thick: Gradually add a small amount of neutral oil (coconut, avocado, or olive) until you reach your desired consistency. You can also add a tiny splash of water or milk, but oil is generally preferred for richness.
- Not Blending: Make sure you have enough bulk for your blender to process. For smaller batches, a food processor might work better, or you might need to double the recipe. Continuously scrape down the sides to push ingredients back into the blades.
For more detailed insights on achieving that perfect texture, check out our article: Secrets to Smooth Granola Butter: Toasting & Ingredient Tips.
Storing and Enjoying Your Homemade Granola Butter
Once your delicious granola butter is ready, transfer it to a clean, airtight jar or container. Store it in the refrigerator, where it will last for several weeks (typically 2-3 weeks). Over time, the butter may thicken in the fridge, but simply let it sit at room temperature for a few minutes or warm it slightly to soften it up. A natural separation of oils might occur; simply stir it back in.
Now for the best part – enjoying your creation! The possibilities are endless:
- Spread it generously on toast, bagels, or rice cakes.
- Drizzle it over yogurt, oatmeal, or smoothie bowls.
- Use it as a dip for apple slices, banana rounds, or pretzels.
- Swirl it into smoothies for extra creaminess and flavor.
- Use it in baking recipes as a flavorful, healthier fat alternative.
- And, of course, enjoy it straight off the spoon!
This Homemade Granola Butter: Your Delicious Nut Butter Alternative is truly a versatile and delightful addition to any kitchen.
Making granola butter at home is a simple yet incredibly rewarding experience. By following these steps and tips, you can create a healthy, smooth, and gluten-free spread that rivals any store-bought version. The process of learning how to make granola butter gives you full control over the ingredients, allowing you to tailor it to your dietary needs and taste preferences. So, grab your blender, gather your ingredients, and get ready to enjoy this delightful, nutrient-rich spread!
